Related Articles:
1. Navigate to Time Tracking Approval
- Log in to Focus HQ.
- Once logged in you will reach your Company’s Homepage. Go to the Top Navigation and click on ‘Time Tracking’.

- Click the ‘Time Tracking Approval’ button.

Time Tracking Approval is part of the Time Tracking functionality in the system where all tracked time for ALL users in the Company submitted for Approval are displayed. User who is assigned as a Time Tracking approver can Approve or Reject submitted Time Tracking entries.
This is the section where users have visibility of such entries.

2. Approve a Time Tracking Entry
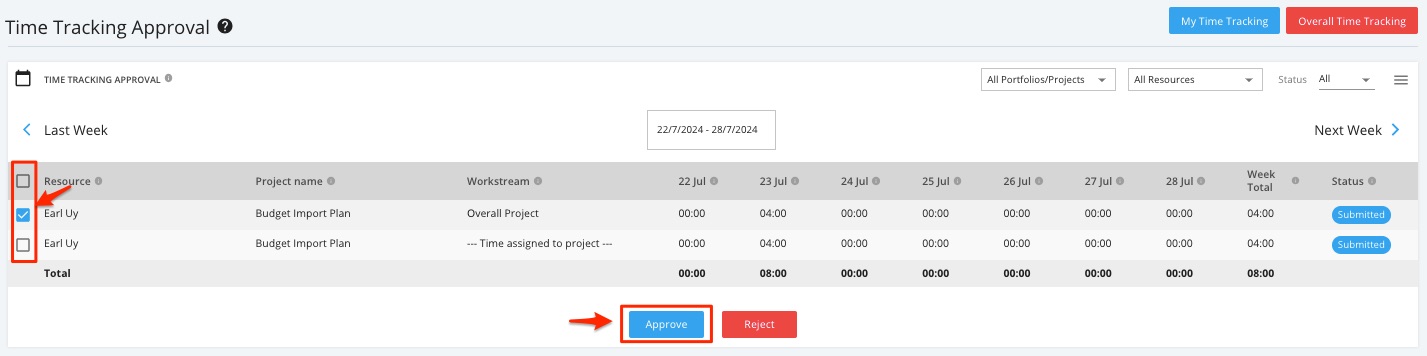

NOTE: Time booked to Non-Project activities is automatically approved.
3. Reject a Time Tracking Entry


4. Filter Time Tracking Approval
Time Tracking Approval Details can be filtered by Portfolios/Projects.
Click the ‘All Portfolios/Projects’ drop down menu and then choose the desired data that you want to display.

Time Tracking Approval Details can also be filtered by Resources.
Click the ‘All Resources’ drop down menu and then choose the desired data that you want to display.

Time Tracking Approval Details can also be filtered by Status.
Click the ‘Status’ drop down menu and then choose the desired data that you want to display.

Time Tracking Approval Details can also be filtered by Period.
You can view a specific week of the month by adjusting the calendar or by clicking the ‘Next Week’ or ‘Last Week’ icon.

5. Download Time Tracking Approval Details
Click the three-lined icon, and then select the format to download:
- Download CSV
- Download PDF

The Time Tracking Approval Details will be saved directly to your device.