1. Import a Schedule from a CSV Format
The user has the option to manage the creation and updates of a project schedule via export and import of CSV files into Focus HQ.
CSV files can be imported into Focus HQ during Phase 3 Planning and Phase 4 Execution.
Important Notes:
- If a CSV file is imported into an existing Schedule, it will overwrite and replace the entire existing Schedule data. There is no version control, only one schedule version is retained at all times.
1. To import a schedule from CSV, click the ‘Schedule’ module from the left sidebar of the page then navigate to ‘Project Schedule’. Once done, click ‘Import WBS’ as shown below.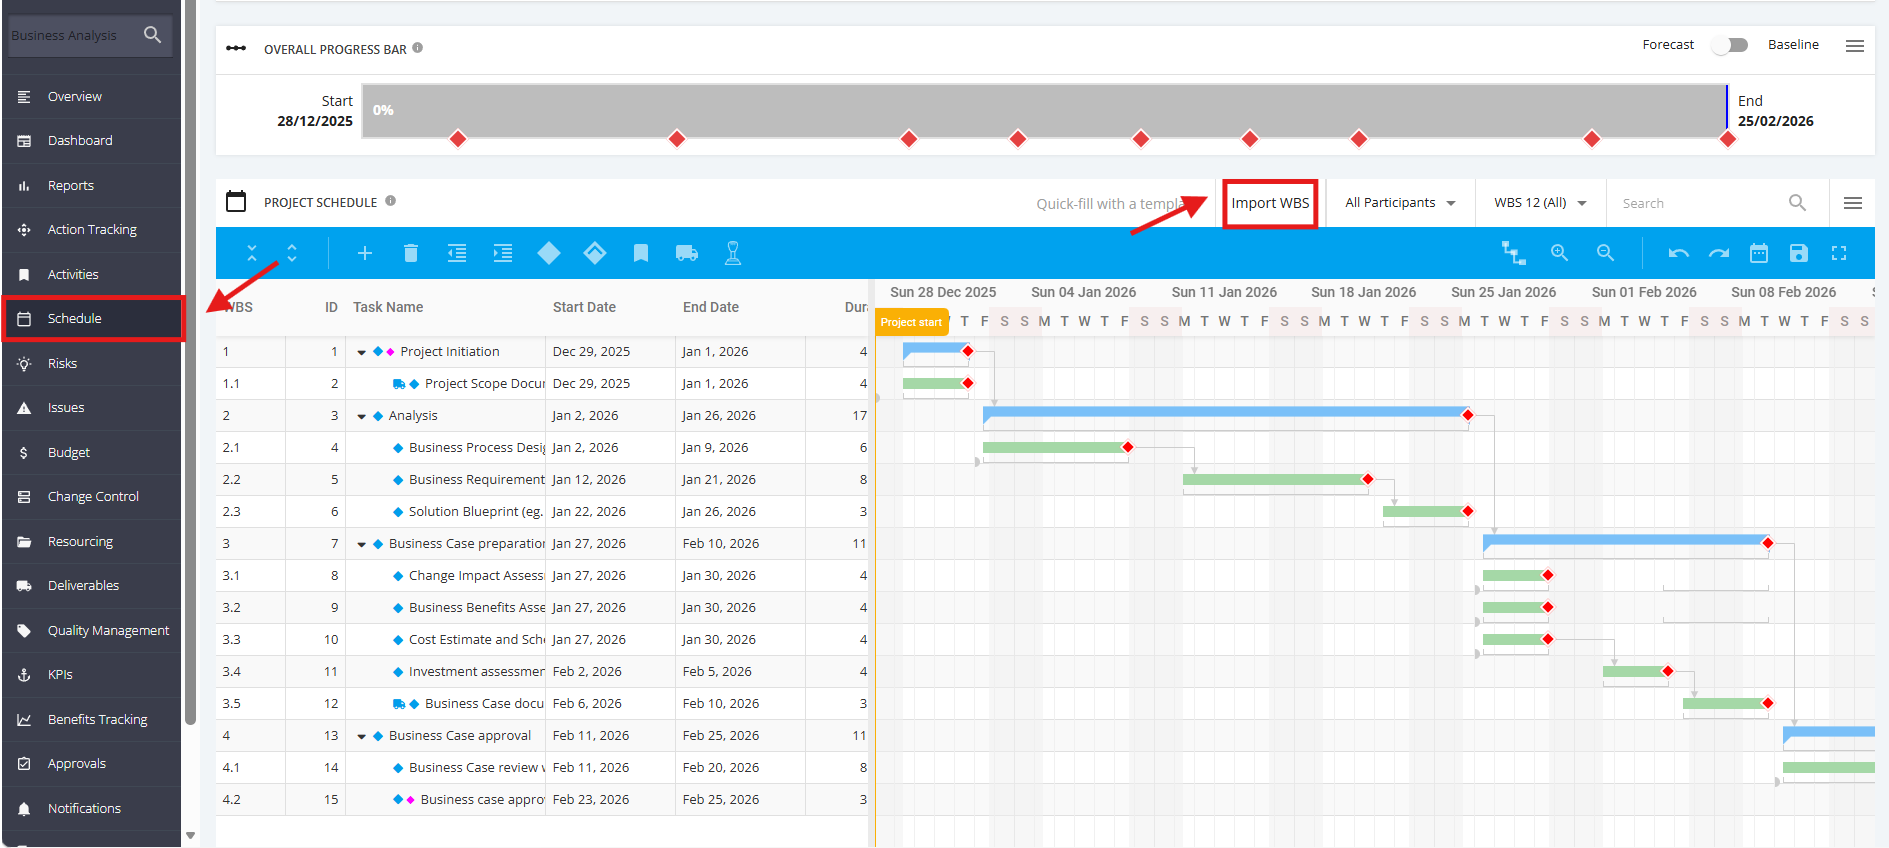
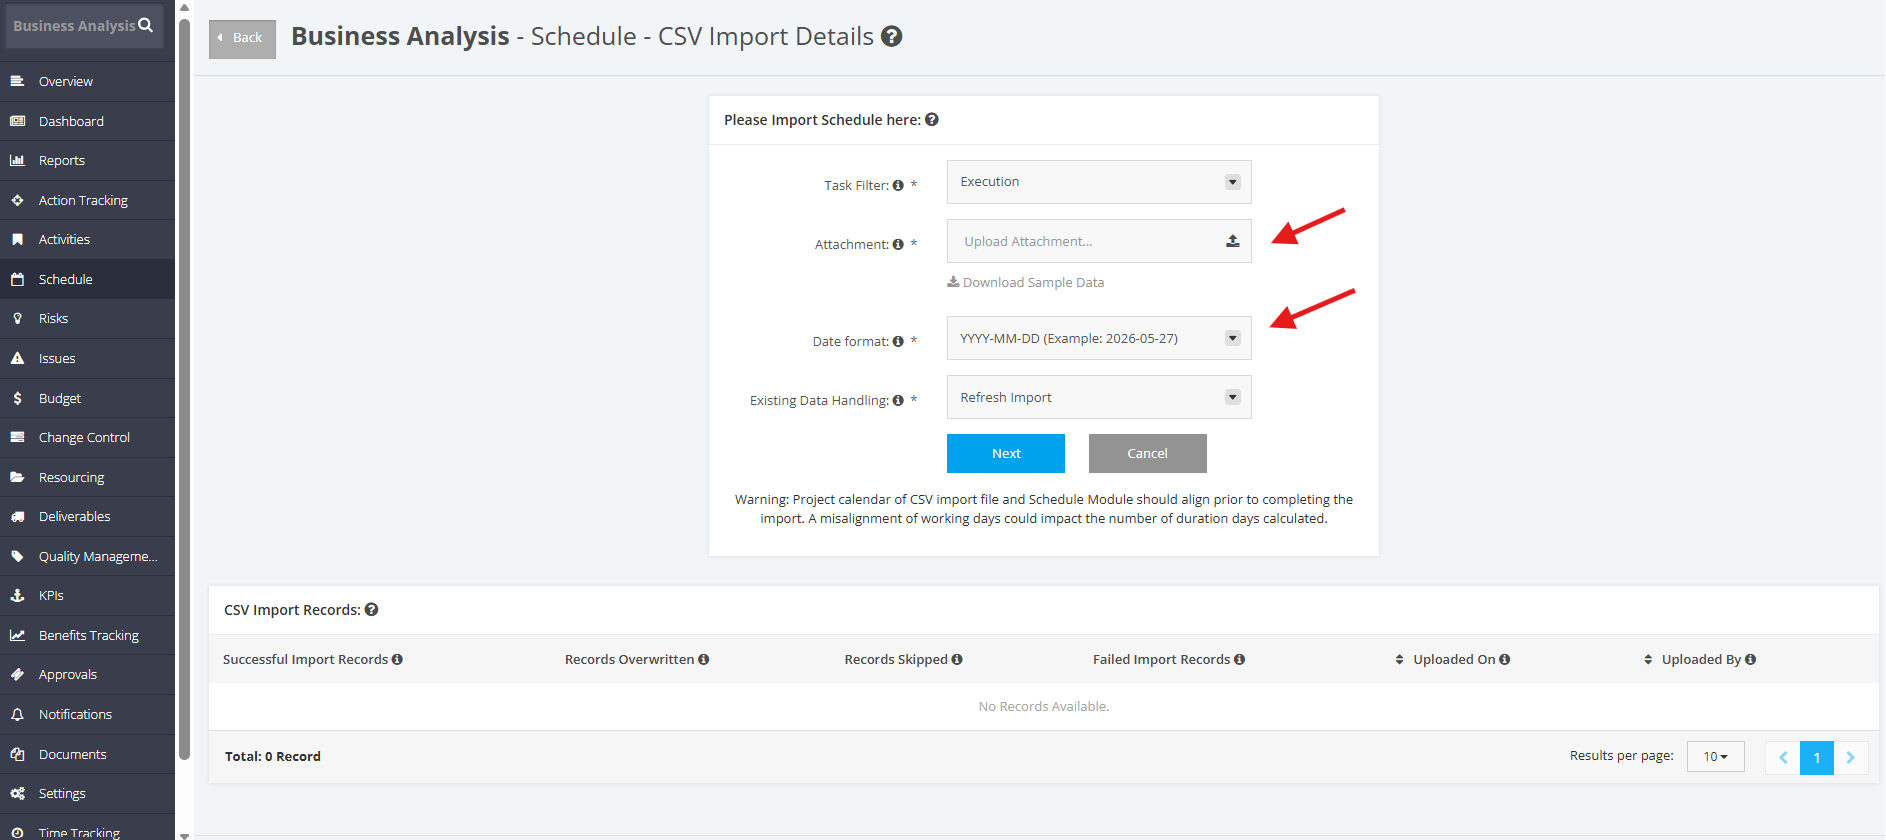
2. Attach the CSV file, then select the date format the CSV is using.
Note: The accepted file type for Schedule Import is CSV (UTF-8).
These are the accepted date formats for the CSV Import:
- YYYY-MM-DD (Example: 2026-06-05)
- YYYY/MM/DD (Example: 2026/06/05)
- YYYY-DD-MM (Example: 2026-05-06)
- YYYY/DD/MM (Example: 2026/05/06)
- DD-MM-YYYY (Example: 05-06-2026)
- DD/MM/YYYY (Example: 05/06/2026)
- MM-DD-YYYY (Example: 06-05-2026)
- MM/DD/YYYY (Example: 06/05/2026)
Once finished, click Next.
3. The CSV Import Mapping section will appear to map the Focus HQ Field Names to the CSV Field names. Select the Saved Mapping template in the top right-hand corner, (Default= PFHQ Schedule Module Mapping). If the field names are identical, the CSV field will be mapped automatically. If the CSV field is not identical, the user must select the relevant field from the drop-down list.
4. Once all fields are mapped select Import, if any required fields are not populated, fields will be identified with a red border. The user has the option to enter Default Values which will be applied to all task missing required data, then select Import to move to the next screen. Alternatively update the source CSV file and recommence the import.
Note: Refer to Schedule Default Assignments with CSV Import article for any defaults applied should an optional field not be mapped.

Important Note:
- A User can create an own custom template to map Focus HQ Field Names to the CSV Field names. Flag ‘Save as Custom Mapping’ and enter name of the template.
- The template will not be saved until successfully imported. The template will be available from a drop-down list:

If unsure on the fields required a user can export a sample template from the CSV Import Details field by clicking ‘Download Sample Data’. A sample CSV file will be provided with all headings and sample data.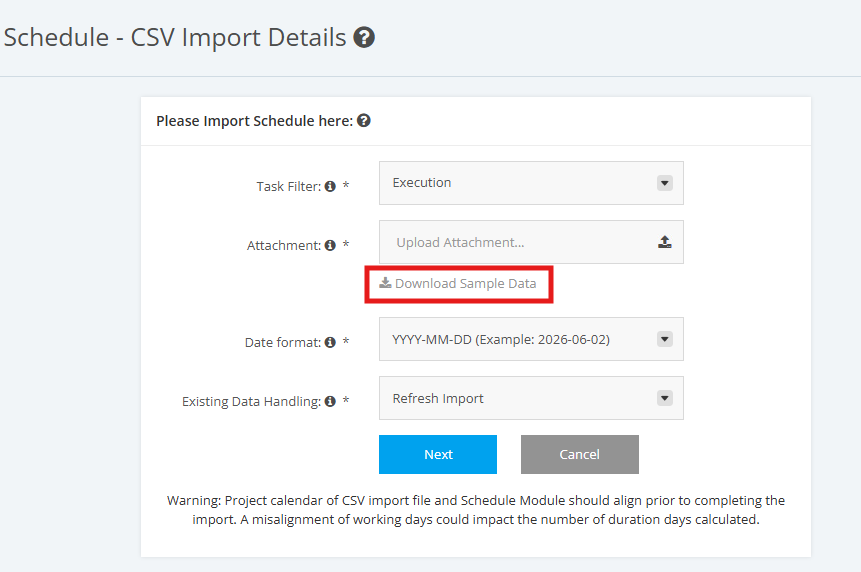
5. Once all fields have been mapped the next step is a system validation on the data. Following messages might appear, with details of the task and message. See example below.
- Error messages – unable to continue the Import, need to select Cancel, update CSV source file and recommence import from the beginning
- Warning messages – able to ‘Proceed with import’ and system defaults will be applied.


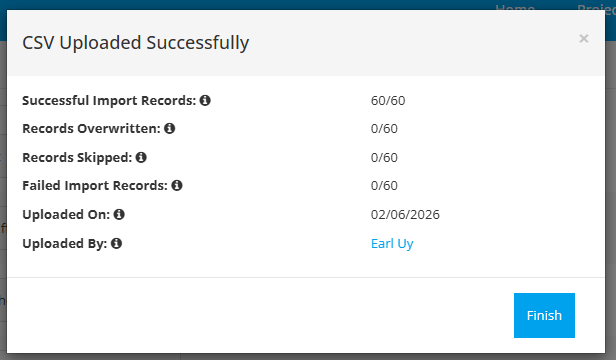
6. Once the System validation is completed or there are no errors the system will import the CSV successfully: